Icons in the navigation menu give more idea about the menu item. Icons can be added to a menu item with the following ways –
1. With an external plugin
Any external plugin that can provide such functionality can be used. Plugins like Menu Icons by ThemeIsle allows adding icons to menus.
2. With Font Awesome icon tag
Font Awesome library offers a number of icons. These icons can be added to menu items with the following steps –
Step 1 – Astra does not come with the Font Awesome library. So the external plugin can be used to load the library to the theme. You can choose a plugin from WordPress Repository that allows loading a Font Awesome library to site. For Example – Better Font Awesome.
Step 2 – Install the selected plugin on the site.
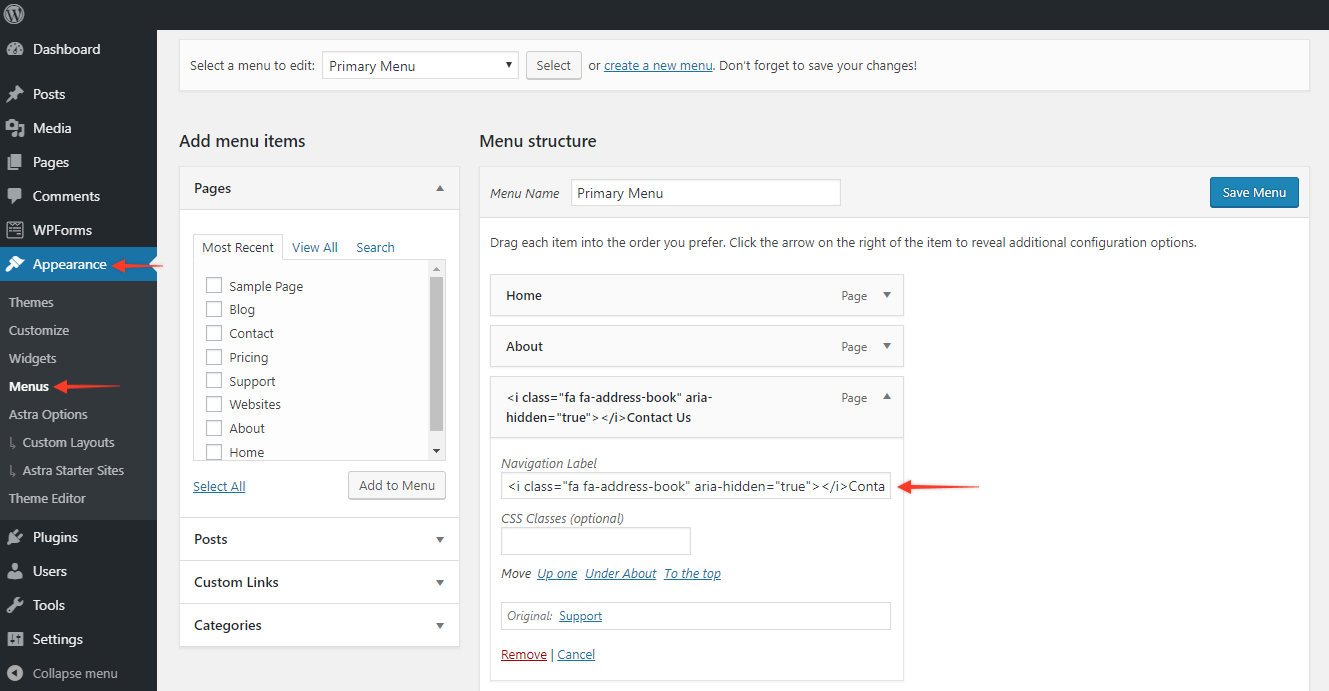
Step 3 – Now visit a menu item where you want to add an icon. Menus are available under Appearance > Menus.
Step 4 – Click on the menu item and in the Navigation Label add <i> tag for the icon from Font Awesome library.
For Example – If you want to add address-book icon to the menu item – Contact. Then after following Step 1 and 2, you can copy the <i> tag code for address-book from the Font Awesome library. Just visit the icon page, select the required icon and copy the code. The code for address-book icon can be copied from the link here. Visit the menu item – Contact and paste the code in the Navigation Label.
